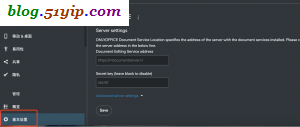
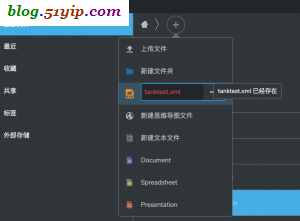
nextcloud安装配置,请参考: centos7 nextcloud nginx php mariadb 安装配置,本文的重点是onlyoffice安装,以及与nextcloud的整合。
1,onlyoffice硬件要求
CPU dual core 2 GHz or better
RAM 2 GB or more
HDD at least 40 GB of free space
Additional requirements at least 4 GB of swap
OS RHEL 7 or CentOS 7
Additional requirements
  PostgreSQL: version 9.1 or later
  NGINX: version 1.3.13 or later
  Node.js: version 8.12.0
  Redis
  RabbitMQ
要求挺高,要求挺高,要求挺高
2,安装依赖
# yum install gcc-c++ automake autoconf gcc make
3,安装epel源
# yum install epel-release
4,安装nodejs8源
# curl -sL https://rpm.nodesource.com/setup_8.x | sudo bash -
5,安装nginx,配置nginx.conf
# yum install nginx
# vim /etc/nginx/nginx.conf

user nginx;
worker_processes auto;
error_log /var/log/nginx/error.log;
pid /run/nginx.pid;

# Load dynamic modules. See /usr/share/nginx/README.dynamic.
include /usr/share/nginx/modules/*.conf;

events {
    worker_connections 1024;
}

http {
    log_format  main  '$remote_addr - $remote_user [$time_local] "$request" '
                      '$status $body_bytes_sent "$http_referer" '
                      '"$http_user_agent" "$http_x_forwarded_for"';

    access_log  /var/log/nginx/access.log  main;
    sendfile            on;
    keepalive_timeout   65;
    include             /etc/nginx/mime.types;
    default_type        application/octet-stream;
    include /etc/nginx/conf.d/*.conf;

}
6,安装启动redis,rabbitmq-server
# yum install redis rabbitmq-server

# systemctl start redis
# systemctl enable redis

# systemctl start rabbitmq-server
# systemctl enable rabbitmq-server
7,安装postgresql
# yum install postgresql postgresql-server

# service postgresql initdb
# chkconfig postgresql on

# vim /var/lib/pgsql/data/pg_hba.conf

host all all 127.0.0.1/32 trust //ident换成trust
host all all ::1/128 trust //ident换成trust

# systemctl restart postgresql
8,创建数据库
# cd /tmp //重要
# sudo -u postgres psql -c "CREATE DATABASE onlyoffice;"
# sudo -u postgres psql -c "CREATE USER onlyoffice WITH password 'onlyoffice';"
# sudo -u postgres psql -c "GRANT ALL privileges ON DATABASE onlyoffice TO onlyoffice;"
9,安装onlyoffice源
# yum install https://download.onlyoffice.com/repo/centos/main/noarch/onlyoffice-repo.noarch.rpm
# cat /etc/yum.repos.d/onlyoffice.repo   //yum完,产生源文件
[onlyoffice]
name=onlyoffice repo
baseurl=http://download.onlyoffice.com/repo/centos/main/noarch/
gpgcheck=1
enabled=1
10,安装配置onlyoffice
# yum install onlyoffice-documentserver

# bash documentserver-configure.sh
Configuring PostgreSQL access...
Host: localhost
Database name: onlyoffice
User: onlyoffice
Password:onlyoffice
Trying to establish PostgreSQL connection... OK
Installing PostgreSQL database... OK
Configuring redis access...
Host: localhost

Trying to establish redis connection... OK
Configuring RabbitMQ access...
Host: localhost
User: guest
Password:guest
Trying to establish RabbitMQ connection... OK
Restarting services... OK

# systemctl start supervisord
# systemctl enable supervisord
11,配置nginx https
# cd /etc/onlyoffice/documentserver/nginx
# cp ds-ssl.conf.tmpl ds-ssl.conf
# ln -s /etc/onlyoffice/documentserver/nginx/ds-ssl.conf /etc/nginx/conf.d/
# cat /etc/nginx/conf.d/ds-ssl.conf  //要软连接
include /etc/nginx/includes/http-common.conf;
## Normal HTTP host
server {
 listen 80;
 server_name onlineoffice.netjoy.com;
 server_tokens off;

 ## Redirects all traffic to the HTTPS host
 root /nowhere; ## root doesn't have to be a valid path since we are redirecting
 rewrite ^ https://$host$request_uri? permanent;
}

#HTTP host for internal services
server {
 listen 127.0.0.1:80;
 listen [::1]:80;
 server_name localhost;
 server_tokens off;

 include /etc/nginx/includes/ds-common.conf;
 include /etc/nginx/includes/ds-docservice.conf;
}

## HTTPS host
server {
 listen 443;
 server_name onlineoffice.netjoy.com;
 server_tokens off;
 root /usr/share/nginx/html;

 ## Strong SSL Security
 ## https://raymii.org/s/tutorials/Strong_SSL_Security_On_nginx.html
 ssl on;
 ssl_certificate /etc/nginx/cert/office.pem;
 ssl_certificate_key /etc/nginx/cert/office.key;
 ssl_verify_client off;

 ssl_ciphers "EECDH+AESGCM:EDH+AESGCM:AES256+EECDH:AES256+EDH";

 ssl_protocols TLSv1 TLSv1.1 TLSv1.2;
 ssl_session_cache builtin:1000 shared:SSL:10m;

 ssl_prefer_server_ciphers on;

 add_header Strict-Transport-Security max-age=31536000;
 # add_header X-Frame-Options SAMEORIGIN;
 add_header X-Content-Type-Options nosniff;

 ## [Optional] If your certficate has OCSP, enable OCSP stapling to reduce the overhead and latency of running SSL.
 ## Replace with your ssl_trusted_certificate. For more info see:
 ## - https://medium.com/devops-programming/4445f4862461
 ## - https://www.ruby-forum.com/topic/4419319
 ## - https://www.digitalocean.com/community/tutorials/how-to-configure-ocsp-stapling-on-apache-and-nginx
 # ssl_stapling on;
 # ssl_stapling_verify on;
 # ssl_trusted_certificate /etc/nginx/ssl/stapling.trusted.crt;
 # resolver 208.67.222.222 208.67.222.220 valid=300s; # Can change to your DNS resolver if desired
 # resolver_timeout 10s;

 ## [Optional] Generate a stronger DHE parameter:
 ## cd /etc/ssl/certs
 ## sudo openssl dhparam -out dhparam.pem 4096
 ##
 # ssl_dhparam /etc/ssl/certs/dhparam.pem;

 include /etc/nginx/includes/ds-*.conf;

}

# systemctl restart nginx
12,下载nextcloud-onlyoffice插件
# cd nextcloud路径/apps/
# git clone https://github.com/ONLYOFFICE/onlyoffice-owncloud.git onlyoffice
13,启用插件
在这里推荐二个插件:
Draw.io(流程图插件)和Mind Map(思维导图插件)
转载请注明
作者:海底苍鹰
地址:http://blog.51yip.com/server/2174.html/comment-page-1


我这边在同一台电脑上弄集成onlyoffice,到11步配置nginx https完 重启nginx 提示错误 不能启动nginx 错误是
:nginx: [emerg] duplicate upstream "docservice" in /etc/nginx/includes/http-common.conf:1
: nginx.service: control process exited, code=exited status=1
: Failed to start nginx - high performance web server.
: Unit nginx.service entered failed state.
: nginx.service failed.求帮助 qq421381118
到11步配置nginx https完 重启nginx 提示错误 不能启动nginx 错误是
Job for nginx.service failed because the control process exited with error code.
See "systemctl status nginx.service" and "journalctl -xe" for details.
. nginx.service - The nginx HTTP and reverse proxy server
Loaded: loaded (/usr/lib/systemd/system/nginx.service; disabled; vendor preset: disabled)
Active: failed (Result: exit-code) since Sun 2020-04-19 22:57:54 EDT; 1min 27s ago
Process: 10913 ExecStartPre=/usr/sbin/nginx -t (code=exited, status=1/FAILURE)
Process: 10912 ExecStartPre=/usr/bin/rm -f /run/nginx.pid (code=exited, status=0/SUCCESS)
4月 19 22:57:54 localhost.localdomain systemd[1]: Starting The nginx HTTP and reverse proxy server...
4月 19 22:57:54 localhost.localdomain nginx[10913]: nginx: [emerg] directive "ssl_certificate" is not terminated by ";" in /etc/nginx/conf.d/ds-ssl.conf>
4月 19 22:57:54 localhost.localdomain nginx[10913]: nginx: configuration file /etc/nginx/nginx.conf test failed
4月 19 22:57:54 localhost.localdomain systemd[1]: nginx.service: Control process exited, code=exited status=1
4月 19 22:57:54 localhost.localdomain systemd[1]: nginx.service: Failed with result 'exit-code'.
4月 19 22:57:54 localhost.localdomain systemd[1]: Failed to start The nginx HTTP and reverse proxy server.
问题应该在这,ssl_certificate /etc/nginx/cert/office.pem;我们目录 下没有此文件,怎么处理?