zabbix能监控到的硬盘信息,其实很多了。但是监控ssd的状态,以及预估使用年限方面是没有的。
zabbix监控支持自定义脚本以及自制模板来扩展监控,这里的脚本既可以用shell也可以用python、php等语言,另外自定义了脚本主要目的是获取业务相关的监控数据,还需要结合zabbix web GUI上的模板才能生效,通过自定义程序脚本后,zabbix监控的灵活度,会高很多。
一,修改zabbix-agent2配置
[root@ticdc1 ~]# egrep -v "(^#|^$)" /etc/zabbix/zabbix_agent2.conf
PidFile=/var/run/zabbix/zabbix_agent2.pid
LogFile=/var/log/zabbix/zabbix_agent2.log
LogFileSize=0
Server=10.0.10.11,127.0.0.1,10.0.10.15
UnsafeUserParameters=1 #允许自定义参数
ServerActive=10.0.10.11
Hostname=ticdc1
Include=/etc/zabbix/zabbix_agent2.d/*.conf
ControlSocket=/tmp/agent.sock
在这里要注意一下,Server=10.0.10.11,127.0.0.1,10.0.10.15,有三个IP。10.0.10.11这个zabbix服务端IP,剩下二个本地和本机对应的局域网IP。加后面二个IP,是为了在本机能检验zabbix的配置。
如果不加,会报以下错
[root@tikv1 script]# zabbix_get -s 127.0.0.1 -p 10050 -k "blk.status[/dev/sda,status]"
zabbix_get [36161]: Get value error: ZBX_TCP_READ() failed: [104] Connection reset by peer
怎么安装zabbix,请参考:centos7 zabbix5 nginx 安装
二,zabbix账户,免密获取root权限
[root@ticdc1 ~]# ps aux |grep zabbix
zabbix 37381 0.3 0.0 2722340 19468 ? Ssl 12月21 4:02 /usr/sbin/zabbix_agent2 -c /etc/zabbix/zabbix_agent2.conf
root 43549 0.0 0.0 112680 976 pts/2 S+ 16:21 0:00 grep --color=auto zabbix

[root@ticdc1 ~]# echo 'zabbix ALL=(ALL) NOPASSWD: ALL' >> /etc/sudoers
三,创建python脚本(网上找的脚本改了改)
1,安装smartmontools
[root@ticdc1 ~]# yum -y install smartmontools
2,硬盘发现脚本
[root@ticdc1 ~]# cat /etc/zabbix/script/blk_discovery.py
#!/usr/bin/env python

# Discovery block device.
# Usage: ./blk_discovery {type}
#    type: ssd/hdd/all
# Example:
#   ./blk_discovery ssd
# Return Json:
#  {
#    "data": [
#            {
#               "{#DEV}": /dev/sda,
#               "{#DEVTYPE}": ssd
#             },
#            {
#               "{#DEV}": /dev/sdb,
#               "{#DEVTYPE}": ssd
#            }
#            ]
# }

import sys
import json
import commands

result = {}

blk_type = sys.argv[1]

def discovery_blk():
    result["data"] = []
    (status, output) = commands.getstatusoutput("lsscsi | grep 'disk' | awk '{ print $NF }'")
    if status != 0:
        return {}
    devs = output.split('\n')
    for dev in devs:
        disk = {}
        //不带raid卡的
        cmmd = "smartctl -i %s | grep 'Rotation Rate:' | awk -F':' '{ print $NF }'" % dev
        (status, output) = commands.getstatusoutput(cmmd)
        if status != 0:
            continue
        if len(output) == 0:   //带raid卡的
            cmmd = "smartctl -d megaraid,0 -i %s | grep 'Rotation Rate:' | awk -F':' '{ print $NF }'" % dev
            (status, output) = commands.getstatusoutput(cmmd)
            if status != 0:
                continue
        dev_type = output.strip().lower()
        if dev_type == "solid state device" and (blk_type == "ssd" or blk_type == "all"):
            disk["{#DEV}"] = dev
            if blk_type == "all":
                disk["{#DEVTYPE}"] = "ssd"
            else:
                disk["{#DEVTYPE}"] = blk_type
        if dev_type != "solid state device" and (blk_type == "hdd" or blk_type == "all"):
            disk["{#DEV}"] = dev
            if blk_type == "all":
                disk["{#DEVTYPE}"] = "hdd"
            else:
                disk["{#DEVTYPE}"] = blk_type
        if len(disk) != 0:
            result["data"].append(disk)
    print json.dumps(result, sort_keys=True, indent=2)

discovery_blk()
3,状态和ssd年限脚本
[root@ticdc1 ~]# cat /etc/zabbix/script/blk_parse.py
#!/usr/bin/env python

# Parse Block Device Status
# Usage: ./blk_parse.py {dev} {feature}
# Example:
# ssd endurance:
#   ./blk_parse.py /dev/sda endurance
# Return:
#   - 34  # Which means SSD has consumed 34% life
# ssd/hdd status:
#   ./blk_parse.py /dev/sda status
# Return:
#   - UP(1),
#   - Down(0)

import sys
import commands

key = sys.argv[1]
feature = sys.argv[2]

class BlkStatus():
    UP = 1
    Down = 0

def get_status(dev):
    cmmd = "smartctl -H %s | grep -i 'health' | awk '{ print $NF }'" % dev
    (status, output) = commands.getstatusoutput(cmmd)
    if status != 0:
        return ""

    if len(output) == 0:  //-d megaraid,0表示带raid卡,反之没有
        cmmd = "smartctl -d megaraid,0 -H %s | grep -i 'health' | awk '{ print $NF }'" % dev
        (status, output) = commands.getstatusoutput(cmmd)
        if status != 0:
            return ""
    status = output.strip().upper()
    if status == "OK" or status == "PASSED":
        return BlkStatus.UP
    return BlkStatus.Down

def get_endurance(dev):
    cmmd = "smartctl -l devstat  %s | grep 'Used Endurance' | awk '{ print $4 }'" % dev
    (status, output) = commands.getstatusoutput(cmmd)
    if status != 0:
        return ""

    if len(output) == 0: //-d megaraid,0表示带raid卡,反之没有
        cmmd = "smartctl -d megaraid,0 -l devstat  %s | grep 'Used Endurance' | awk '{ print $4 }'" % dev
        (status, output) = commands.getstatusoutput(cmmd)
        if status != 0:
            return ""
    return int(output)

def blk_parse():
    result = ""
    if feature == "endurance":
        result = get_endurance(key)
    elif feature == "status":
        result = get_status(key)
    else:
        pass
    print result

blk_parse()
注意:该脚本是跑在python2下,python3要自己改一下,因为python3没有commands。
4,配置zabbix-agent2自定义脚本
[root@ticdc1 ~]# cat /etc/zabbix/zabbix_agent2.d/blk-status.conf
UserParameter=blk_discovery[*],sudo /etc/zabbix/script/blk_discovery.py $1
UserParameter=blk.status[*],sudo /etc/zabbix/script/blk_parse.py $1 $2
UserParameter=blk.hdd.status[*],sudo /etc/zabbix/script/blk_parse.py $1 "status"

[root@ticdc1 ~]# chmod +x /etc/zabbix/script/blk_*
注意:上面的*表示参数,可单个,可多个,后面会提到
5,测试自定义的python脚本
//发现硬盘
[root@ticdc1 ~]# zabbix_get -s 127.0.0.1 -p 10050 -k "blk_discovery[ssd]"
{
  "data": [
    {
      "{#DEVTYPE}": "ssd",
      "{#DEV}": "/dev/sda"
    }
  ]
}

//硬盘状态
[root@ticdc1 ~]# zabbix_get -s 127.0.0.1 -p 10050 -k "blk.status[/dev/sda,status]"
1

//ssd年限预估
[root@ticdc1 ~]# zabbix_get -s 127.0.0.1 -p 10050 -k "blk.status[/dev/sda,endurance]"
0
如果有数据,那说明客户端配置没有问题了,剩下的就是和服务端整合了
四,zabbix管理后台配置
1,自定议脚本
左侧菜单=》配置=》模板=》创建模板
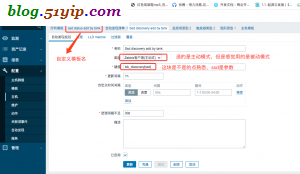
2,创建自动发现规则
hdd和ssd自动发现的区别,只是参数问题
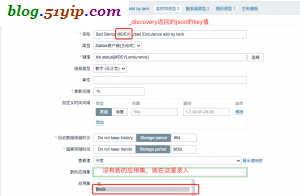
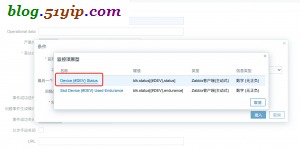
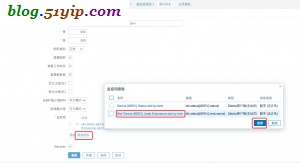
3,添加sdd和hdd监控项原型
自动发现里面的监控项原型和模板里面监控项,是不一样的
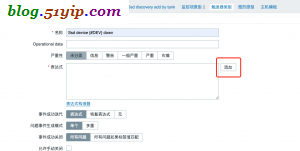
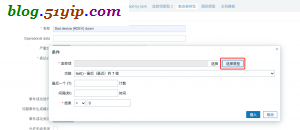
4,添加触发器原型
自动发现里面的触发器原型和模板里面触发器,是不一样的
5,添加图形原型
6,将新增的模板加入主机
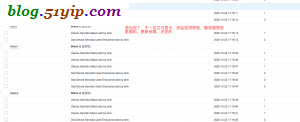
7,查看自动发现结果
转载请注明
作者:海底苍鹰
地址:http://blog.51yip.com/server/2453.html
